Set Up Active Directory Domain Services
Introduction
The following report gives step by step instructions on how to transition a full installation of Windows Server 2012 down to Core. It will then show you how to use this new environment to configure a server using only a CLI interface.
Together, we will install Active Directory to our server and promote it to a Domain Controller using PowerShell commands. We will also be using commands to create new organizational units, security groups, and users. A Windows Client will also be added to the domain that we will create. Following this report and completing all these steps should help refine your skills using PowerShell.
Please note that throughout this report, PowerShell commands are highlighted so that you can simply copy and paste them into your own PowerShell terminals while following along. However, I'd recommend physically typing them out, so that you can become more familiar with the PowerShell syntax.
Transition from GUI to Server Core
After Windows Server 2012 has been installed with GUI, there are two ways to transition the server to Core. It can be done using either the GUI interface, or with PowerShell commands. This report will go through the transition steps using PowerShell. These steps were taken from the TechRepublic article by Jesus Vigo titled How to switch between GUI and Core in Windows Server 2012 using PowerShell, with some details added by myself (See full article here: https://www.techrepublic.com/article/how-to-switch-between-gui-and-core-in-windows-server-2012-using-powershell/).
- Log on to your server with an account that has administrative rights on that server.
Run PowerShell as an Administrator and elevate User Account Control permissions, if prompted. You can do this by clicking on the taskbar shortcut on Windows Server 2012.
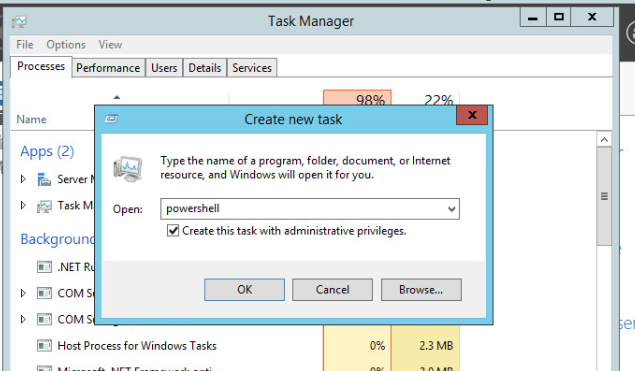
If that shortcut is not there, you can also open Task Manager (CTRL+ALT+DELETE). Ensure that you have expanded it to show "More details". Click "File", then "Run new task". In the dialog box that pops up, type "powershell" and be sure to check off the box that says "Create this task with administrative privileges." Click "OK" and the PowerShell terminal will open.
Uninstalling the two Windows features that are associated with Server GUI (Server-Gui-Shell and Server-Gui-Mgmt-Infra) will enable Server Core. The features may be uninstalled individually by replacing *gui* after the -Name switch below or uninstalled together by entering the following command:
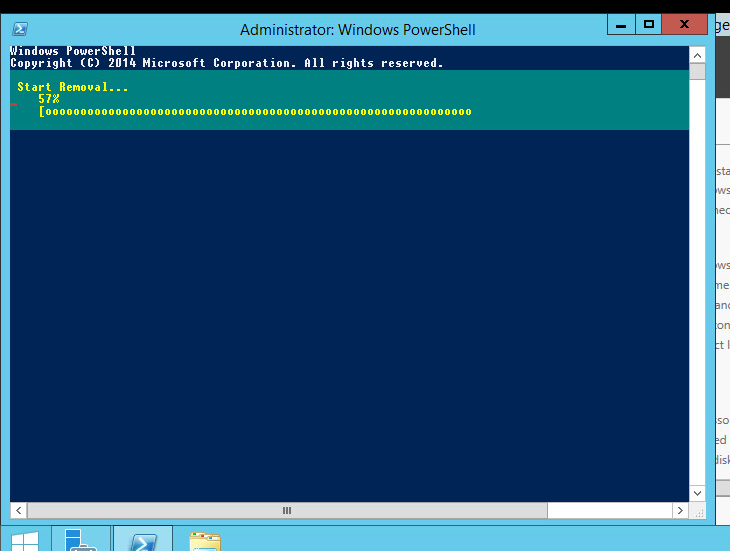
Get-WindowsFeature -Name *gui* | Remove-WindowsFeature -RestartPress enter to execute the command. Your terminal will show the removal progress, like in the image below. Wait for the process to complete.
Once the uninstallation has completed, the server will need to reboot. The -Restart argument will carry out that operation automatically. After reboot, the server will display the logon screen as usual, except in Server Core after authenticating, only the command prompt will be displayed, like below.
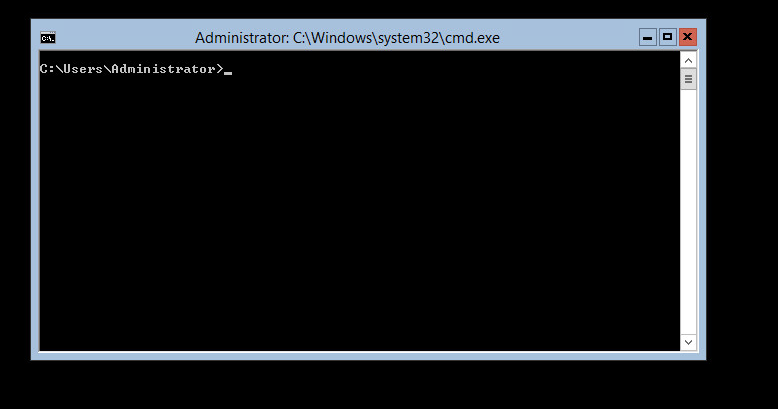
The Server GUI is now removed! You still have all the capabilities of Windows Server 2012, but now you will need to use the command prompt and PowerShell terminal.
Quick Tips for Navigating the Core Environment
If you ever accidentally close the command prompt window, you can still open a new window. Simply open Task Manager (CTRL+ALT+DELETE), click "File", "Run new task", and type "cmd". When you run the task, your command prompt window will be back good as new!
We will be using many PowerShell commands throughout the rest of the report. You can start PowerShell by typing the command "powershell" in your command prompt. You can return to the command prompt with the command "exit". If you want a dedicated window to execute PowerShell commands, you can open a new window by executing "start powershell" in the command prompt.
Configure LAN Interface and IP Addresses
Now that the GUI is removed, we will learn how to configure the network properties of the server with terminal commands.
Configuring pfSense
The particular environment that I have uses pfSense. For my environment, I will need to configure the pfSense router in order to set the foundation for the rest of my network. The following images shows the welcome screen for pfSense after bootup:
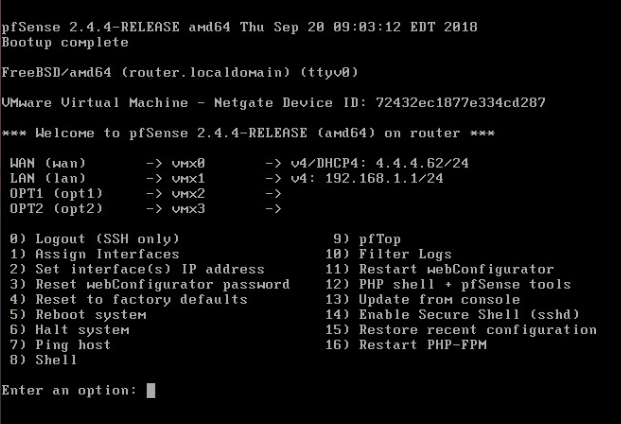
The network address 192.168.10.0/24 will be used for this report. The pfSense LAN interface will need to be modified to reflect the new gateway address. The steps to configure this are below:
- In the menu presented above, select Set interface(s) IP address by entering 2.
- The next menu will ask you what interface you want to modify. Select the LAN interface by entering 2.
- You will then be asked for an IP address. This interface will act as the default gateway for the network. Enter the IP address as 192.168.10.1
- You will then need to enter a subnet mask. Enter it in CIDER notation as 24.
- The next menu will prompt you to enter a new LAN IPv4 upstream gateway address. This is only relevant for WAN interfaces. This is not a WAN, so press ENTER for none.
- The next prompt will allow you to enter the IPv6 address. This is unnecessary for our purposes, so ENTER for none.
- You will then be asked if you want to enable DHCP. Enter n for no.
- Finally, you will be asked to revert to HTTP. We want to continue using HTTPS (it is more secure), therefore enter n for no.
After following the steps above, the changes will be saved. The output should be as follows:
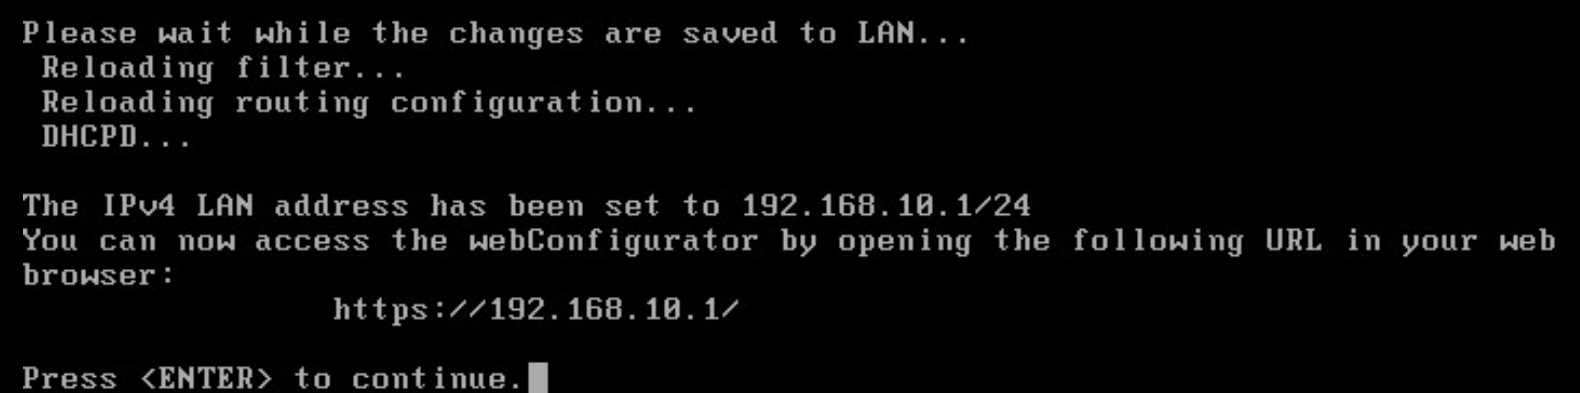
The LAN interface has now been successfully configured.
Set Hostname and IP address with PowerShell
The server will need a recognizable hostname and IP address. Here are the steps to configure these properties via PowerShell:
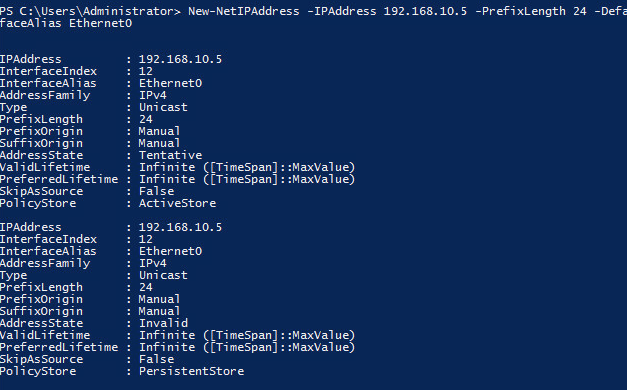
The IP address that we want for the server is 192.168.10.5/24. The default gateway is the LAN interface that we configured above (192.168.10.1). Enter the following command to configure this:
New-NetIPAddress -IPAddress 192.168.10.5 -PrefixLength 24 -DefaultGateway 192.168.10.1 -InterfaceAlias Ethernet0You should have the following output:
Please note that the InterfaceAlias may be different on your machine. You can view your interface alias with this command:
Get-NetIPAddressYour server is likely running on Pacific Standard Time. In order to change your time zone to EST (or your particular time zone), use execute the following command:
Tzutil.exe /s "Eastern Standard Time"The hostname we want for our server is DC01. In order to rename your server's hostname, execute the following command:
Rename-Computer -NewName DC01After renaming your server, you will need to reboot the machine. Do so with this command:
Restart-Computer
After following these steps, your machine will have a new name, new IP address, and be in the correct time zone.
Active Directory and Domain Controller Promotion
In order to install Active Directory, one simply needs to execute a single PowerShell command. For my purposes, the domain I am creating will be called "marmarie.lab". The PowerShell command that you can copy and paste to install active directory is this:
Install-WindowsFeature -Name AD-Domain-Services -IncludeManagementTools IncludeAllSubFeaturesThis command will then display a progress screen like this:

The output after completion should look like this:

After the installation is complete, you still need to promote your server to a domain controller. Please note that the domain Netbios name is dependant on your domainname. The extended command to do so is as follows:
Install -ADDSForest -CreateDnsDelegation:$false -Databasepath "C:\Windows\NTDS" -DomainMode "Win2012R2" -DomainName "marmarie.lab" -DomainNetbiosName "MARMARIE" -ForestMode "Win2012R2" -InstallDns:$true -LogPath "C:\Windows\NTDS" -NoRebootOnCompletion:$false -SysvolPath "C:\Windows\SYSVOL" -Force:$trueThat said, many of the arguments given are the default values. So, if you want a shorter command to do the same thing as above, simply enter this:
Install-ADDSForest -DomainName "marmarie.lab"After entering either -ADDSForest command above, you will need to enter a Safe Mode Administrator Password. Do so, and make sure that it is both secure and something that you can remember. You should then see something like this:
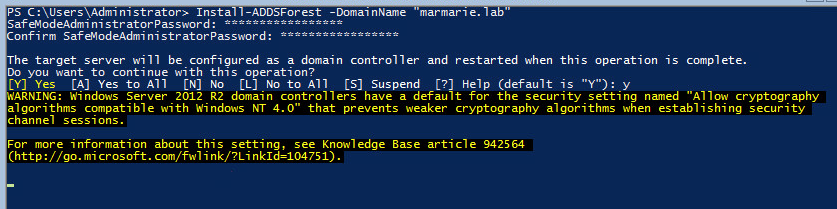
You will be prompted to restart the computer to complete the promotion process. Do so, and after restarting your server should successfully have been promoted to a domain controller.
Add Windows Client to Domain
You can now add a Windows Client to the domain that you have create. The following section will go through the steps to do so. Please note, the steps below must be done on a Windows Client running Windows 8.1 or above. These should not be done on your server.
Configure DNS and IP Address
In order for your client to be able to translate the domain name of your server to its IP address, DNS must be properly configured. Your client must also be on the same network as your server. In order to configure these settings, follow these steps:
- Right-Click on the Network icon in the system tray.
- Select "Open Network and Sharing Center"
- In the section "View your active Networks" select "Ethernet"
- In the window that opens, select "Properties"
- Scroll through the items in the list and double-click on "Internet Protocol Version 4 (TCP/IPv4)"
The IP address for the client computer in this report will be 192.168.10.10. It will use the same default gateway as the server (192.168.10.1), and use the Windows 2012 Server as its DNS server (recall that its IP address is 192.168.10.5). Enter that information like so:
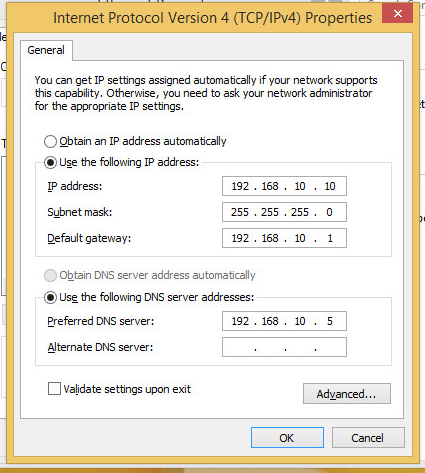
Be sure to click OK in the above window, as well as OK in the Ethernet properties window before it. After doing so, the network settings are sufficient to allow you to add your Windows client to your domain.
Associate Client with Domain
Here are the steps to add your Windows client to the server's domain:
- Right-click on the Windows start charm (bottom-left hand of screen).
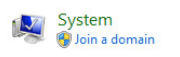
- Select "System"
- In the search bar of the window that pops up, type the words "domain"
One of the options that comes up should be "Join a domain". Select it.
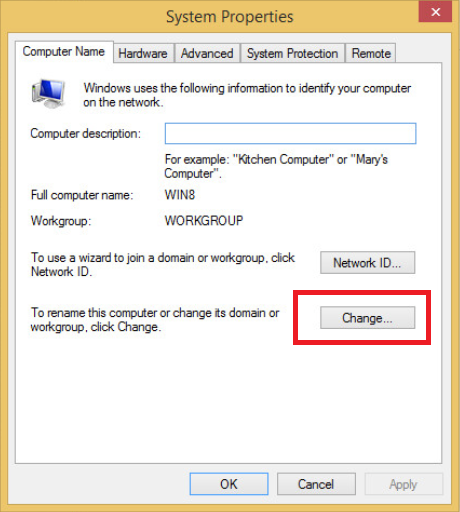
In the window that pops up, click the "Change…" button to change the domain (highlighted below).
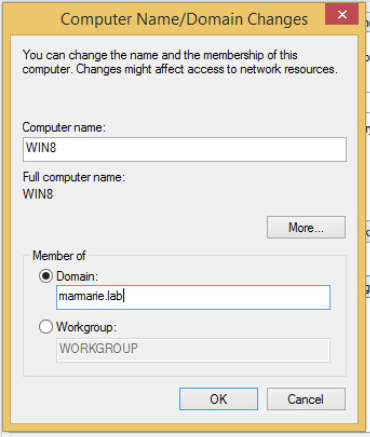
In the window that appears, you can change your computer name (mine is WIN8). But the important bit is to select "Domain:" under the section "Member of", and enter the name of your server's domain (in my case marmarie.lab).
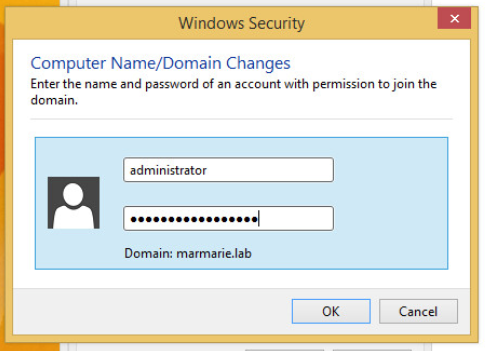
Click OK, and you will be prompted to enter administrator credentials to give your client permission to join the domain. Enter "administrator" for the user name, and the administrator password for your Windows Server (not your client).
After following these steps, you will see this alert:
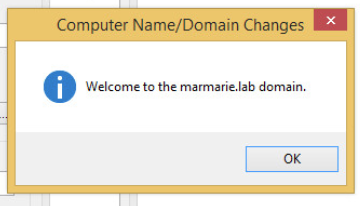
You will then be prompted to restart your computer. Do so, and when you restart, you will be able to sign into an account on your server's domain.
In order to sign into your server's domain, you will need to select "Other user" when logging in on your Windows client. Of course, we have yet to create any users for your client to sign in, so we can't test this out just yet. After going through the next few sections of this report, you will be able to sign in as a user of marmarie.lab (or whatever your domain is called). You can see how to do so at the end of Step 7: Create Users.
Create Organizational Units
The next step is to create organizational units within your domain. The following steps should be carried out on your Windows 2012 Server, and be executed as PowerShell commands. Here are the steps to create organizational units:
We want to create two organizational units, one called "Sales" and another called "Techs". Here are the two commands to create them:
New-ADOrganizationalUnit "Sales" -path "DC=marmarie,DC=lab"New-ADOrganizationalUnit "Techs" -path "DC=marmarie,DC=lab"Please note that you can't enter periods within the string argument for path. Therefore, instead of entering a period, you will need to enter period-separated words as separate "DC" arguments.
After executing each command, you should see no feedback. That is good, that means no errors were made in your syntax.
To confirm that the organizational units have been created successfully, enter the following command:
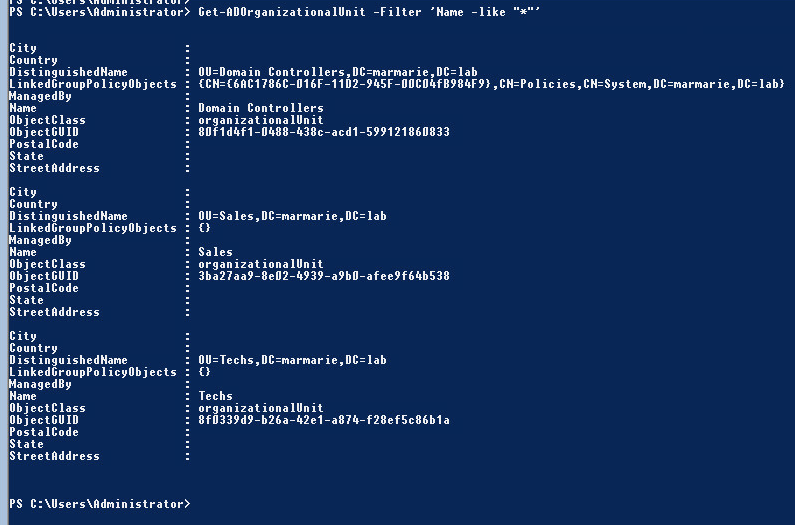
Get-ADOrganizationalUnit -Filter 'Name -like "*"'This command will display all organizational units on your domain, including the ones you have just created. Modify the filter if you have many organizational units already, and just want to see the ones you have just created (e.g.
'Name -like "Sales"'). Learn more about this command on Microsoft's documentation website (https://docs.microsoft.com/en-us/powershell/module/activedirectory/get-adorganizationalunit?view=winserver2012-ps).Here is what my output for that command looks like after creating my organizational units:
Create Security Groups
You will now want to create security groups within your organizational units. Here are the steps to do so:
We are going to create two security groups, one called secSales, and one called secTechs. secSales and secTechs will be nested within the organizational units Sales and Techs, respectively. Here are the commands to create them:
New-ADGroup "secSales" -GroupScope Global -Path "OU=Sales,DC=marmarie,DC=lab"New-ADGroup "secTechs" -GroupScope Global -Path "OU=Techs,DC=marmarie,DC=lab"Similar to when we created the organizational units, executing these commands should give no output. Otherwise, an error has occurred.
To confirm that these security groups were created successfully, run the following command:
Get-ADGroup -Filter 'Name -like "sec*"'Learn more about this command here: https://docs.microsoft.com/en-us/powershell/module/addsadministration/get-adgroup?view=win10-ps
Here is what my output looks like:

Create Users
Finally, we need to create users for our domain. Within this report we will be creating 6 users, 3 in each of the organizational units that we created in Step 5.
Creating Users with a CSV File
We will be doing this with a csv file. This is a scalable method for creating users, because one single PowerShell command can be used to create thousands of users within a csv file. In this section, I will show you the format for the csv file so that you can make your own, and expand on it whenever you need to. Here are the steps to create users with a csv file:
In order to create the csv file for this exercise, run the following PowerShell command:
NotepadThe notepad application will launch, and you will be able to create a file to store your users' information. You will need the following headings: Username, UPN, GivenName, Surname, DisplayName, Path, and Password. The records in the file will need to be in that order. Here is the contents of my csv file that you can copy and paste into your own:
Username,UPN,GivenName,Surname,DisplayName,Path,Password
spilgrim,"spilgrim@marmarie.lab",Scott,Pilgrim,"Scott Pilgrim","OU=Sales,DC=marmarie,DC=lab",Secret123
rflowers,"rflowers@marmarie.lab",Ramona,Flowers,"Ramona Flowers","OU=Sales,DC=marmarie,DC=lab",Secret123
kchau,"kchau@marmarie.lab",Knives,Chau,"Knives Chau","OU=Sales,DC=marmarie,DC=lab",Secret123
kpine,"kpine@marmarie.lab",Kim,Pine,"Kim Pine","OU=Techs,DC=marmarie,DC=lab",Secret123
sstills,"sstills@marmarie.lab",Stephen,Stills,"Stephen Stills","OU=Techs,DC=marmarie,DC=lab",Secret123
wwells,"wwells@marmarie.lab",Wallace,Wells,"Wallace Wells","OU=Techs,DC=marmarie,DC=lab",Secret123
Please note that each of the entries in the csv files should be in one line. Each of these represents a record in a table.
- Save the file as users-info.csv. Be sure not to save it as a .txt file by mistake. I saved my file in the absolute path C:\Users\Administrator\Documents\user-info.csv, but you can save yours anywhere as long as you remember where.
Next, you will need to execute the following command:
Import-Csv .\Documents\users-info.csv | ForEach { New-ADUser $_.Username -UserPrincipalName $_.UPN -GivenName $_.GivenName -Surname $_.Surname -DisplayName $_.DisplayName -Path $_.Path -AccountPassword (ConvertTo-SecureString -AsPlainText $_.Password -Force) -ChangePasswordAtLogon $true -Enabled $true }Executing this command will create a user for each record within the csv file. If everything was done correctly, you shouldn't see any output, and therefore no errors occurred.
Finally, we will want to confirm that our users were created successfully. Here are the commands to see the users within our Sales and Techs organizational units, and the output that I have on my server when executing them:
Get-ADUser -Filter * -SearchBase "OU=Sales,DC=marmarie,DC=lab"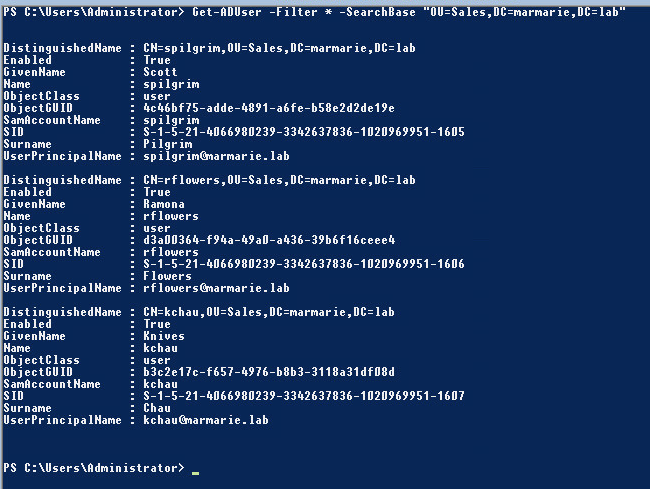
Get-ADUser -Filter * -SearchBase "OU=Techs,DC=marmarie,DC=lab"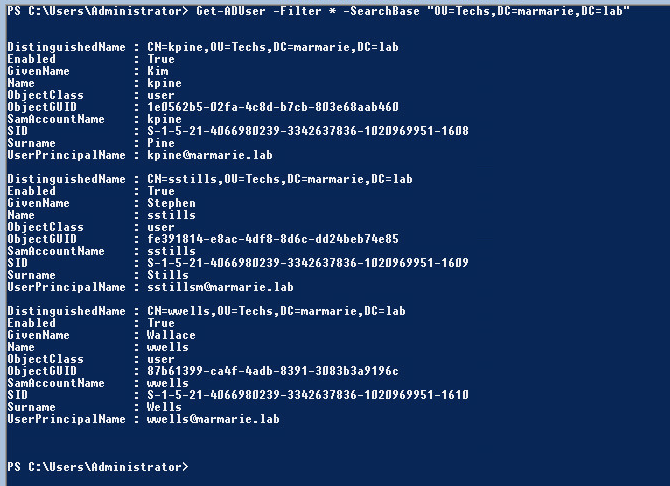
Logging in as a User on the Windows Clients
Now that we have users on our domain, members of the domain will be able to sign in as these users. Let's go back to our Windows Client to sign in. Here are the steps to sign in:
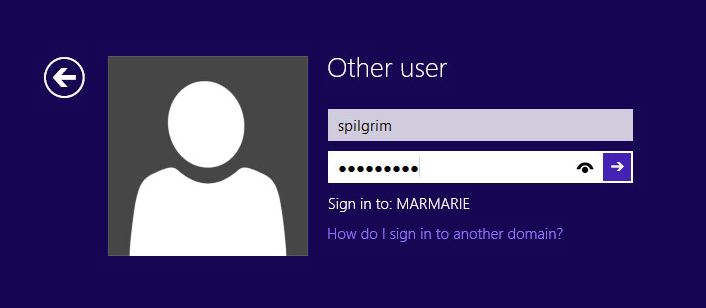
- From the login screen of your Windows client that is part of your server's domain, select "Other user"
Enter in the user name for one of the users you created, and their associated password like so:
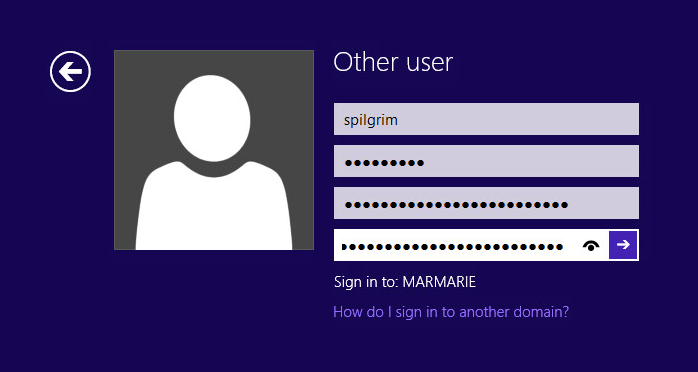
You will be prompted to change your password, do so:
Take a look at the start screen, and you should see that you are signed in:
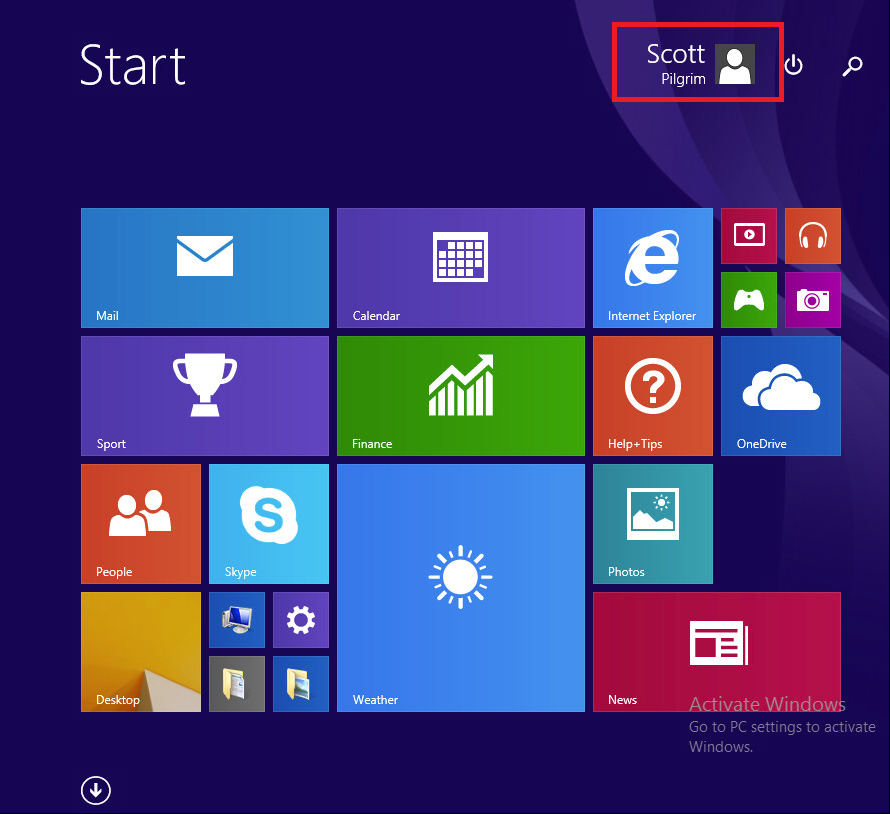
Congratulations, you now have a working domain and users to log in as!
Conclusion
After following along with this report, you should have a fully configured Windows 2012 Server that has Active Directory installed and that has been promoted to a Domain Controller. You should have basic organizational units and security groups in place, and the tools to add as many users as you need to these groups. You should also have the knowledge to be able to add Windows clients to your domain and login. All of this should have helped refine your skills using Windows PowerShell. Thank you for following along.
References
- Microsoft Windows Server 2012 PowerShell Documentation:
- TechRepublic article by Jesus Vigo, How to switch between GUI and Core in Windows Server 2012 using PowerShell
- Thomas Maurer article, Windows Server 2012 – Add and Remove GUI
- Lecture material by Robert Pearce from SYST 23551 – Windows Administration, taken at Sheridan College (2019)